
Sitecore 10 - ASP.NET Core
Sitecore 10 also brought us a new option for development: ASP.NET Core.
Let's have a quick look.
Sitecore has been leveraging ASP.NET Core in the past by having the Publishing Service run on it and Sitecore Identity for example too. So Sitecore is moving more and more towards .NET Core. With Sitecore 10, a new development option is also available: the ASP.NET Core SDK
Which is a Headless development option that is now available beside the ones already usable with Sitecore JSS: Vue, React and Angular.
Those are front-end frameworks specifically tailored for front-end developers.
While ASP.NET Core SDK tailors more towards back-end developers and allows us to work with the latest and greatest .NET Technology.
There is a Helix example available on Github to get you started. And Sitecore has also provided a Sitecore MVP website which is on the public Github repo (to which you can contribute)
Don’t just talk about Sitecore JSS, talk about Sitecore Headless Services.

Sitecore didn’t give it an acronym yet. I don’t think SHS is used for something else yet.
Example architecture
When we look at the basic Sitecore XM architecture, you’ll have this example here. Off course, using Docker containers.
I used the Sitecore MVP repository for testing purposes. So you’ll see several references to it in the screenshots.
This is the default Sitecore XM structure for a .NET Core headless setup.
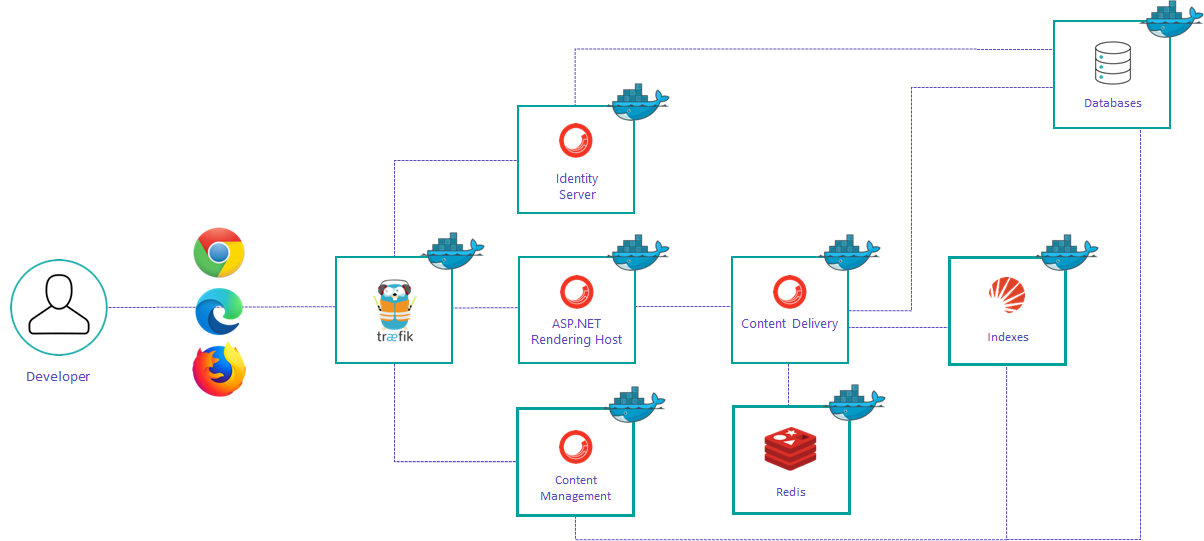
You need an ASP.NET Rendering host (also called engine) which uses the Content Delivery container.
The traefik reverse proxy role allows you to run all these instances easily. It takes care of finding the correct container instance to return to the browser.
I did have some problems locally with the traefik reverse proxy. If you are having problems too, make sure that you don't have a VPN connection open. Restarting Docker completely also helped on some occasions.
Let’s zoom in a little bit on the Rendering Host and the Content Delivery container.
On the Content Delivery, you need to have the Sitecore Layout Service installed. Which is responsible to provide layout and content information to the rendering host.
The Sitecore Layout Service is a Headless Service endpoint that provides JSON formatted Sitecore content.
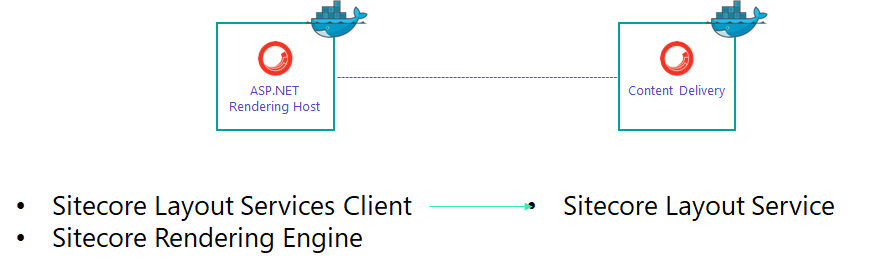
You use the Sitecore Layout Service Client to communicate with the Layout Service, and you use the Sitecore Rendering Engine to render the content.
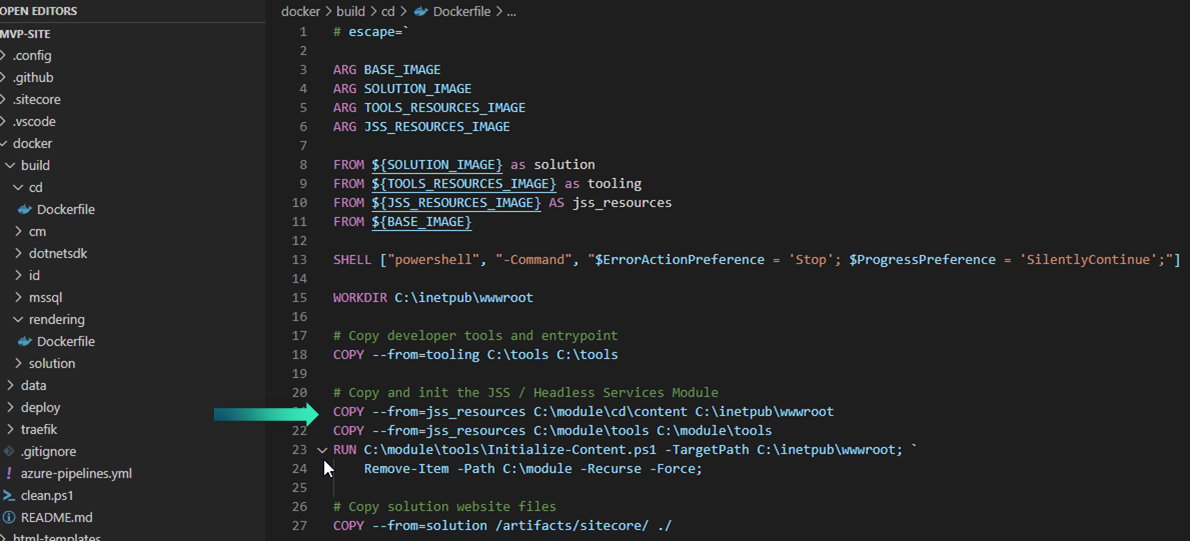
Configuration of the CD instance
Your CD instance needs to have the Headless Services Module installed.
Here you can see the Docker build file that includes the jss_resources to do this. These are also necessary on the CM instance!
Configuration of the rendering host
For the rendering host itself, we need to make some configurations to the .NET Core project.
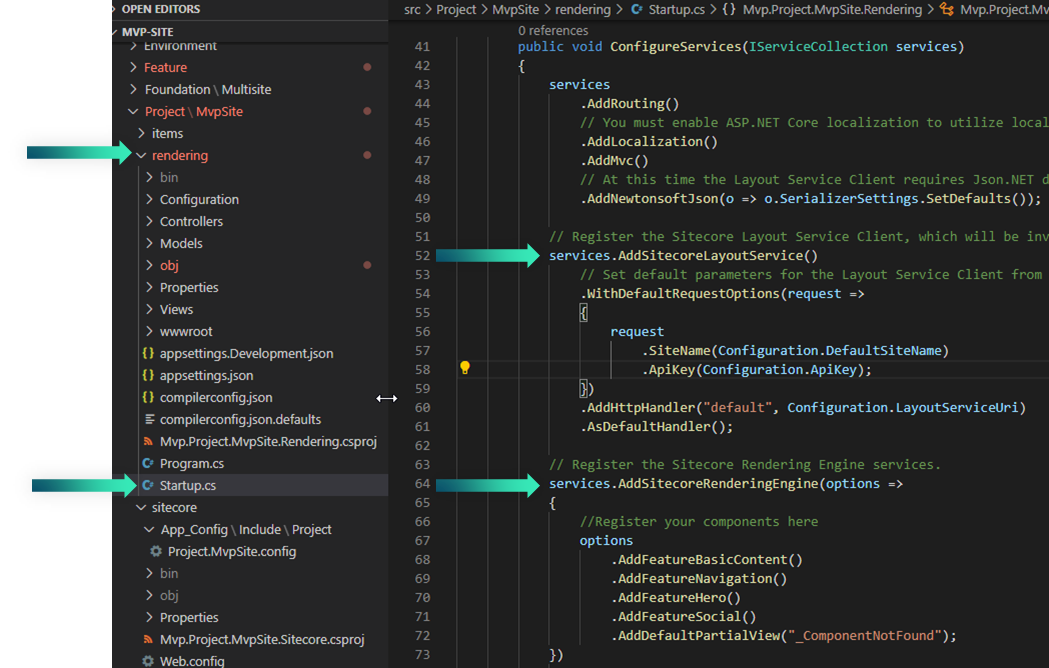
- Here it is called rendering, in the Project\MvpSite folder.
- In the Startup.cs file, we define the SitecoreLayoutService. So that your .NET Core application knows where to get the Sitecore layout and items from.
- It requires the SiteName, an ApiKey and the LayoutServiceUrl. Those are configured in the appsettings.json file. In this case the appsettings.Development.json
- Additionally, we register all the components that the .NET Core application will use in the SitecoreRenderingEngine. These are references to the different Feature and Foundation modules in the solution.
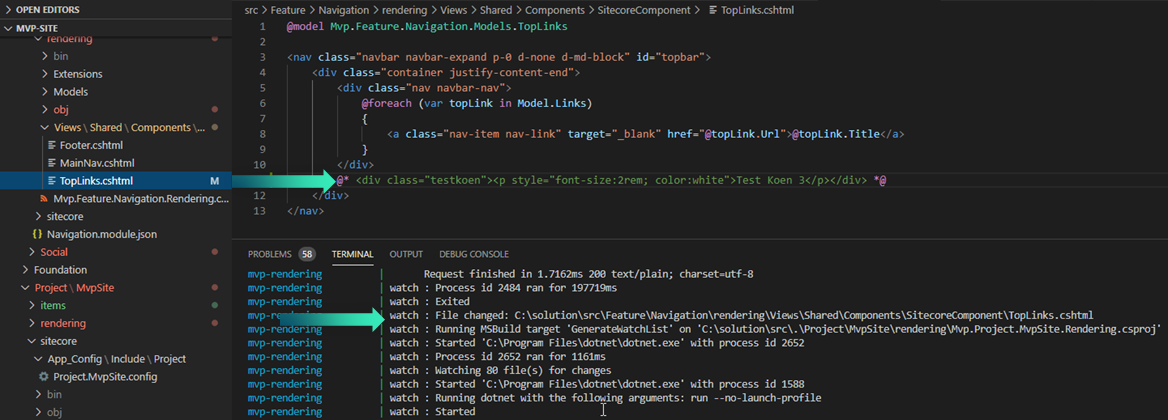
dotnet watch
One of the advantages to work this way, is that you can do your presentation layer development in your ASP.NET Core rendering host with rapid recycles and no need to make code pushes to the content delivery instance.
This is because the RenderingHost project uses dotnet watch which will automatically compile and deploys all changes to the container.
Example on the screenshot, I made some small changes to the TopLinks cshtml, the watcher is running and automatically compiles and deploys the changes.
I did some testing with these small changes; it takes about 10 to 15 seconds before they show up on the website itself.
So still faster than IIS sites and having to do manual publishes.
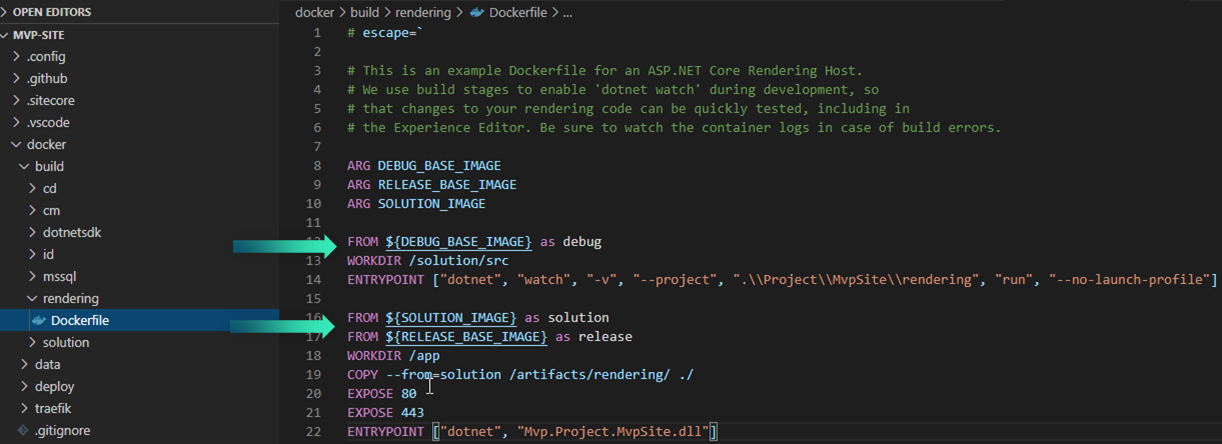
Here is the example of the rendering Docker build file. It creates an image for debug, which will start the dotnet watcher.
Running the MVP website - up.ps1
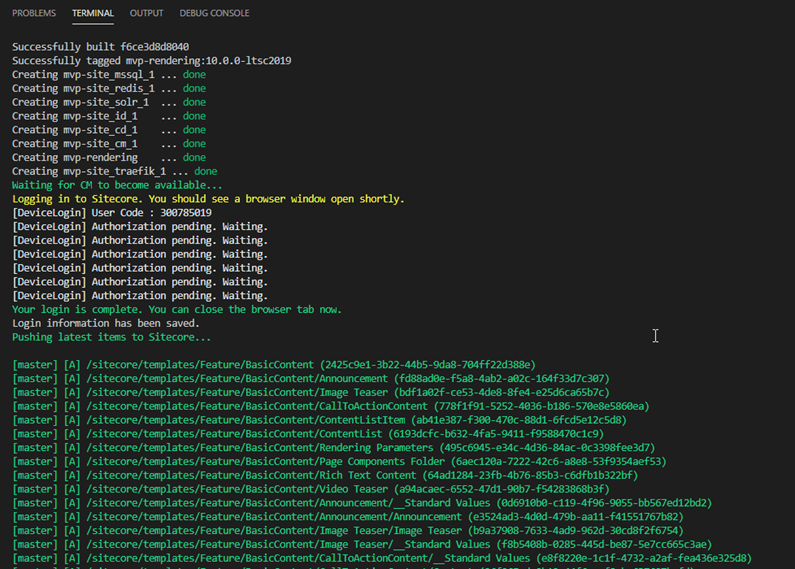
The Sitecore MVP repository contains a separate up.ps1 powershell file file. And instead of running the docker compose up –d manually, you run that script. Which will build docker-compose build and provision your environment and do some additional things like:
- using the Sitecore CLI to login:
Sitecore CLI login - then pushing the serialized items:
Sitecore CLI serialize push - and publishing them:
Sitecore CLI publish - it will also automatically open the CM and rendering host websites
What do I do next?

I think the main question remaining now is: how do I add stuff to my website
So lets go through the process really – really - quick on how to add a rendering and what you need to know about the whole process.
JSON Renderings - 2 options
You define your Sitecore renderings, just like you have been used to in the past. When adding a rendering in Sitecore, choose a JSON rendering.
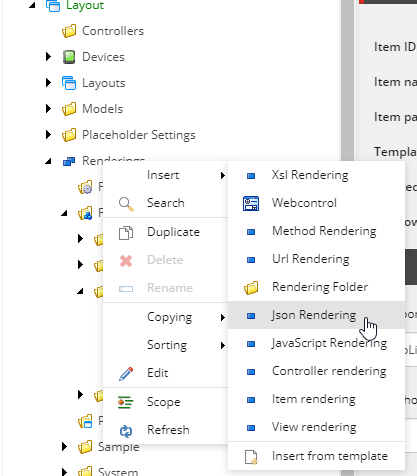
After choosing this, you basically have 2 options here based on the fields you fill in on the JSON rendering itself.
- you have the simple option, a rendering that needs a datasource.
- and a more advanced, a rendering with a rendering contents resolver.
Step 1 - create rendering
Here we have the Image Teaser example. Notice the Component Name field.
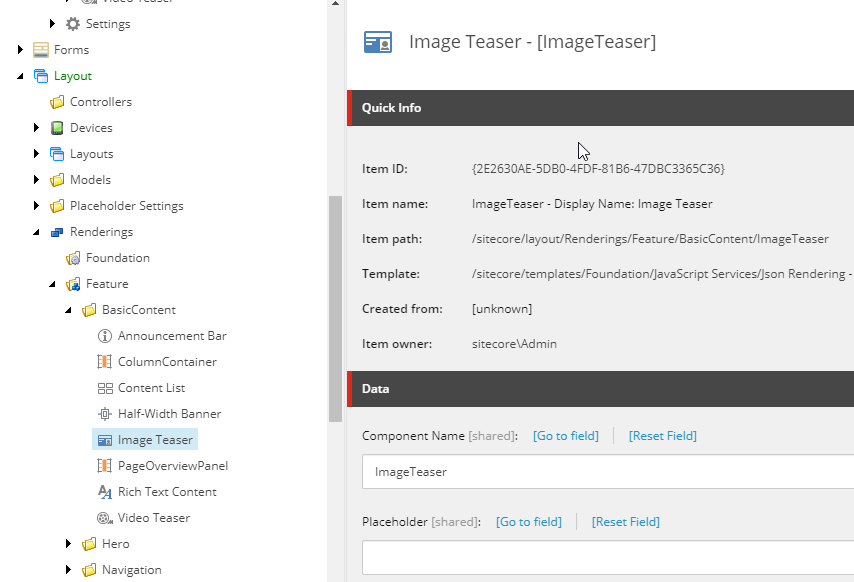
It also has DataSource Location and Template fields.
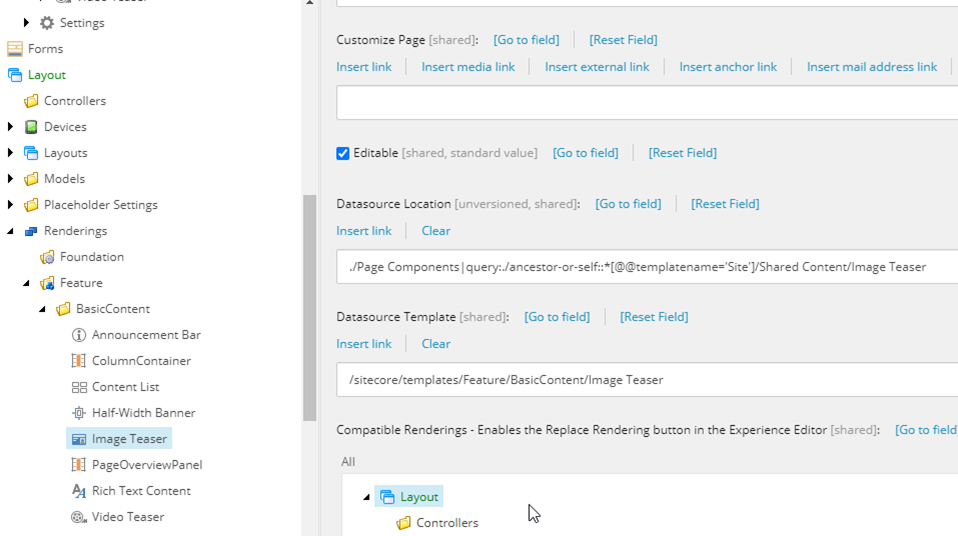
Nothing special and pretty straightforward, when you add the rendering to a page, select the datasource that you want.
This is all that is necessary in Sitecore. Adding it to a page and publishing it will make it available in the Layout service.
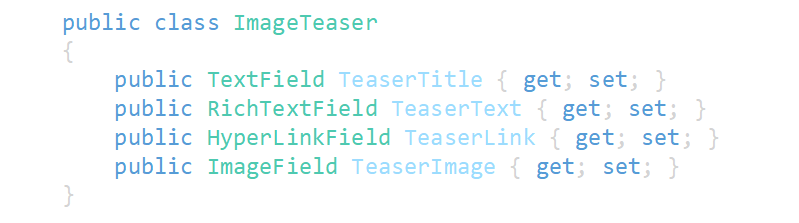
Step 2 - create model
The next steps are all done in the .NET Core project.
You start by creating the model for your view.
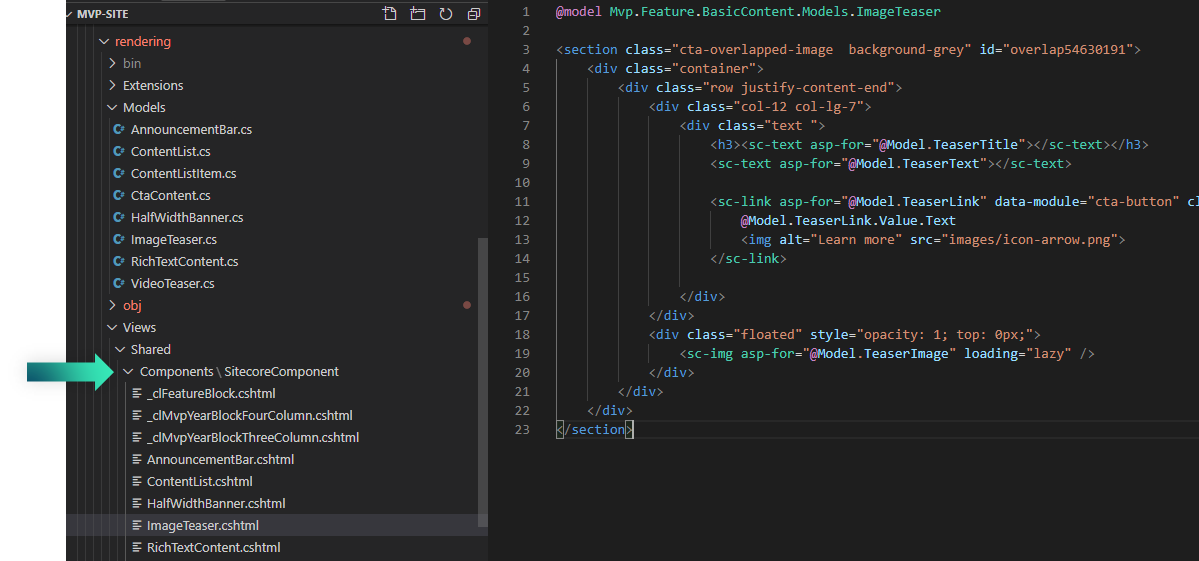
Step 3 - create the view
Create the cshtml razor view.
Notice the path of the view! Sitecore automatically looks into that folder for the available views.
It needs to be that path: Views/Shared/Components/SitecoreComponent
Step 4 - bind model to view
Final step is to register the Model and bind it to the the rendering defined in Sitecore.
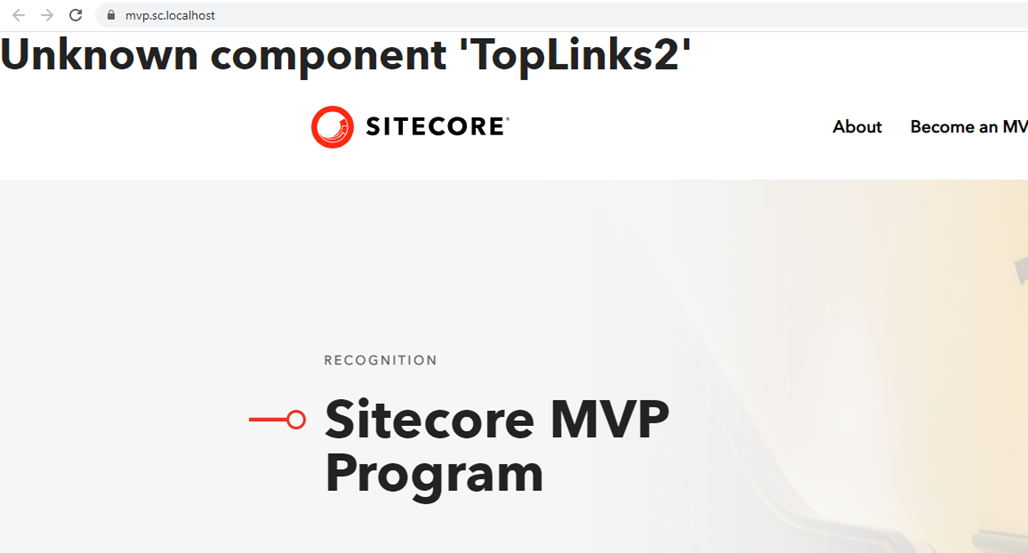
The name must match the ComponentName on the JSON rendering in Sitecore.

Otherwise, you’ll get a message on the page: ‘Unknown component’. Which we want to avoid off course.
Alternative rendering
The slightly Advanced method uses a Rendering Contents Resolver.
So you still have your JSON rendering, and you can still define a datasource location and template.
But additionally, you specify a Rendering Contents Resolver.
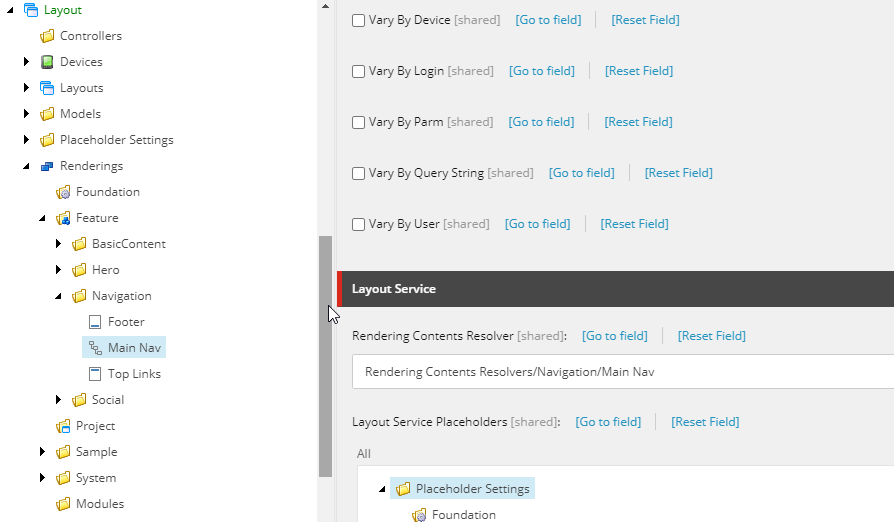
In the selected Main Nav example, a Main Nav Rendering Contents Resolver was selected.
Remember this picture from before, Advanced uses Rendering Contents Resolvers.
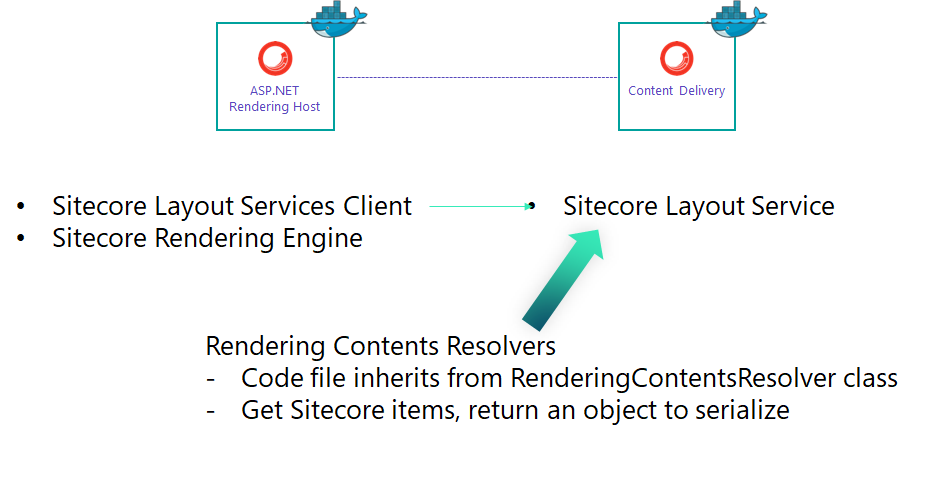
Which is just saying: Hey Sitecore Layout Service, here is a code file that says how to get or manipulate Sitecore items and which returns an object that you can serialize to JSON.
So for our Main Nav rendering, we have – in our Sitecore code project - our custom Content Resolver that inherits from Rendering Contents Resolver.
It overrides the ResolveContents method which returns an object.
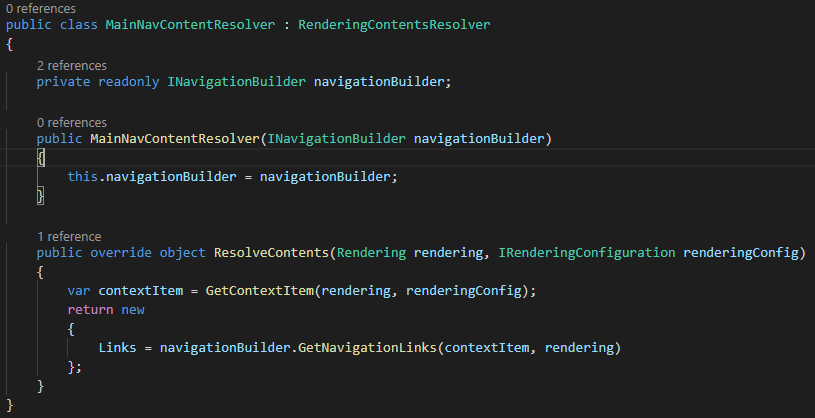
In this case, the MainNavContentResolver uses the NavigationBuilder class – which is dependency injected – to fetch the navigation links.
Configure rendering contents resolver in Sitecore
Important, you need to configure create and define those resolvers in Sitecore first.
In the System/Modules/Rendering Contents Resolvers folder!
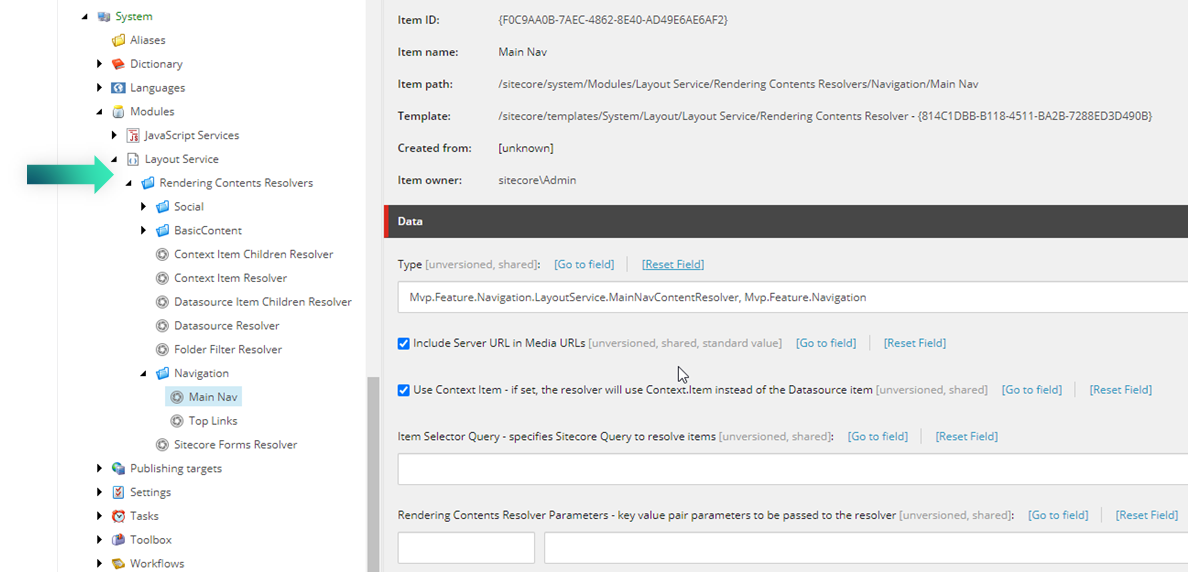
You can then select them in the JSON rendering field, like we saw earlier.
What can be improved?
This concludes my introduction to ASP.NET Core and the Sitecore Rendering Engine.
I can imagine you need to get used to it a little bit more. Following the documentation of Sitecore really helped me. I do wish they would add some more screenshots. I’m more of a visual guy than just reading documentation pages.
I don’t have a lot to recommend right now to improve everything. Since I just started dabbling around with it myself.
Perhaps some scaffolding using the Sitecore cli can be useful.
Such as running a command to:
- create a model based on a datasource in Sitecore
- automatically creating the rendering contents resolver
Sources
- https://www.sitecore.com/knowledge-center/blog/355/anything-but-lightweight-sitecore-moves-to-a-net-core-architecture-4417
- https://doc.sitecore.com/developers/100/developer-tools/en/sitecore-headless-development.html
- https://doc.sitecore.com/developers/100/developer-tools/en/layout-and-site-requirements-for-asp-net-core-rendering.html

