
Custom content personalization outside the Experience Editor
We needed to personalize content in a webservice that is consumed by a non-Sitecore project and although this seems challenging, it was actually pretty easy to do.
I wanted to go through the basic steps so you get an overview of what needs to be done.
What we will be creating
We start with setting up the necessary Sitecore templates, create a test item and then we'll have a look at some C# code.
Our personalisation will return a message (single line text) based on the current day. So the external project will be able to return a different message for each day of the week.
Setup the rules & actions you are going to use
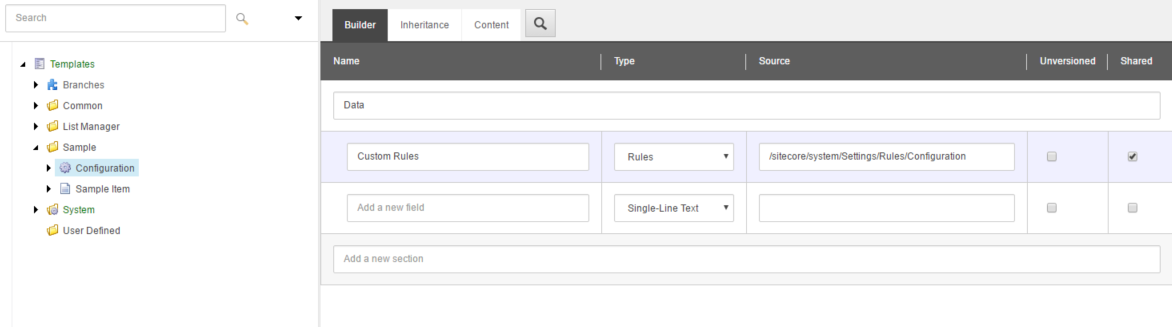
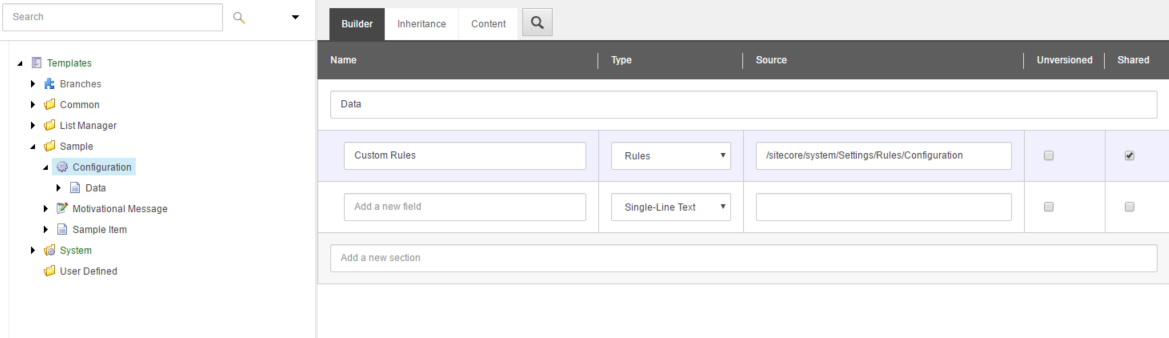
1. Add a Rules Type field to your template
As an example I've created a Configuration template with a field called Custom Rules. The type of this field must be Rules (under the System Types section).
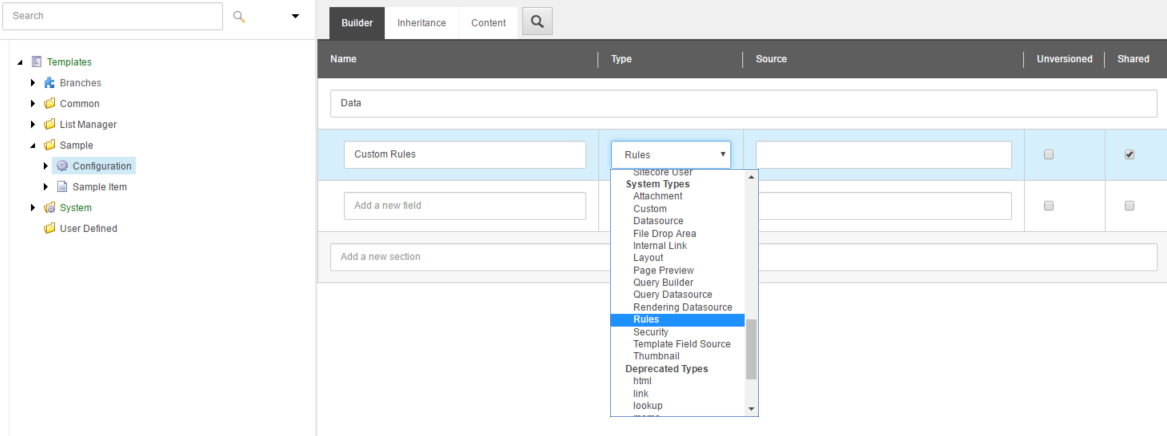
If you create an item with this template, you won't be able to select any conditions or actions. We still have to fill in the Source of the Rules field.
This is what you'll see:
![]()
2. Creating a Rule Context
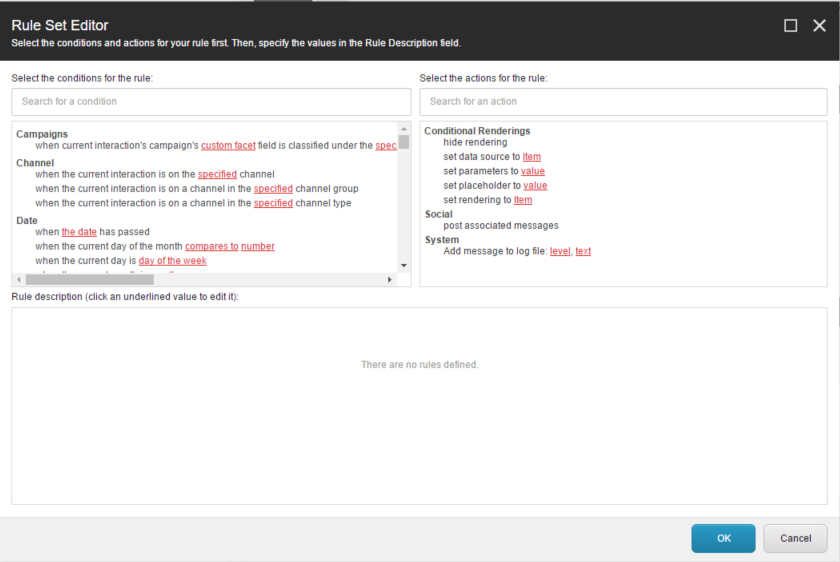
What is missing in the Source field is a link to a Rule Context. Which is basically a collection of conditions and actions which can be used in a certain context.
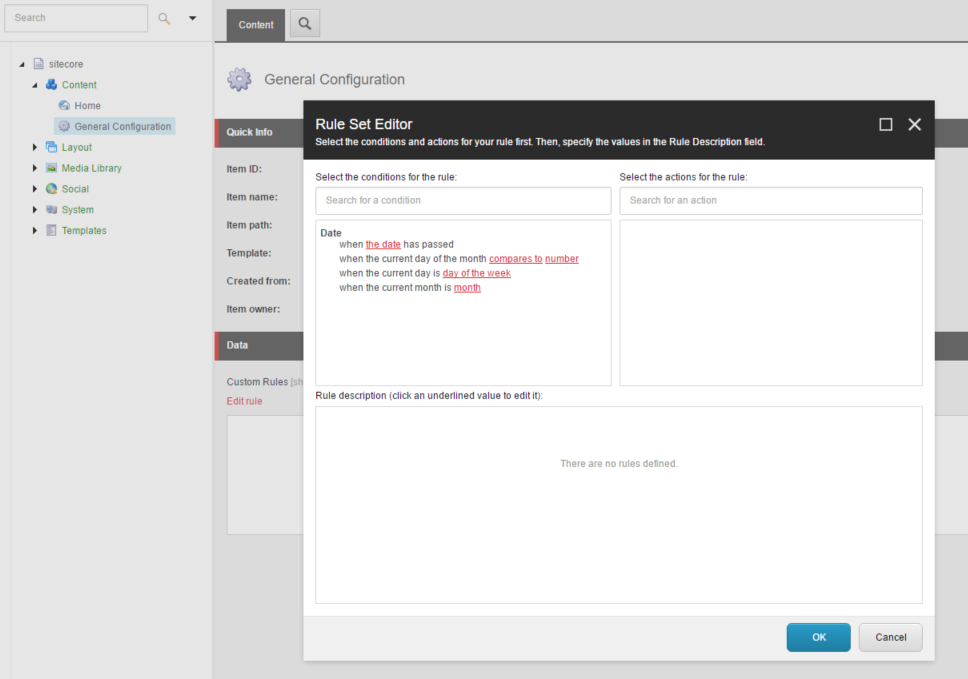
Technically you can use an existing context which already has all the conditions and actions defined. An example is pointing the Source to: /sitecore/system/Settings/Rules/Conditional Renderings
Which is used on the personalization in the Experience Editor. Here is the result of this source:
But I would not recommend this since not all conditions and actions will be useful.
And when you want to execute your rule field in code you will not always have the context of a user, device or visit (unless you work around this too).
2.1 Create the new Rule Context
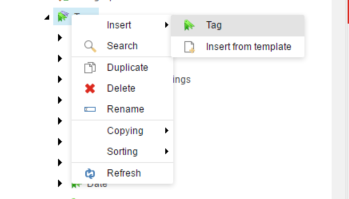
Navigate to /sitecore/system/Settings/Rules, right-click and Insert a new Rules Context Folder.
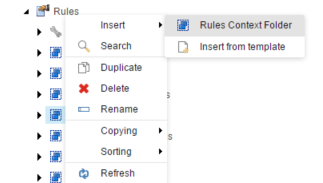
I've called mine Configuration:

Try not to get confused here!
The Rule Context contains a Rules Folder. This can contain rules that get executed when this Rule Context runs. Examples can be found in Item Saved, Item Deleted and Version Removed. These are not the actions you will be able to choose in the Rule Set Editor.
An excellent walkthrough was written for the EXM. Which describes how to configure a rule that sends an email when an Item gets deleted.
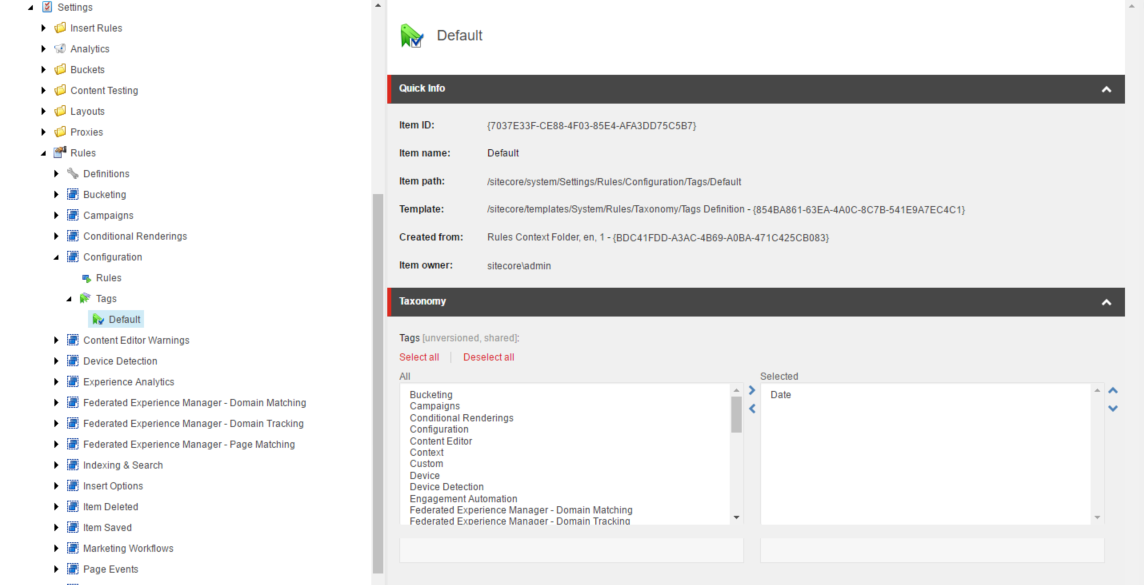
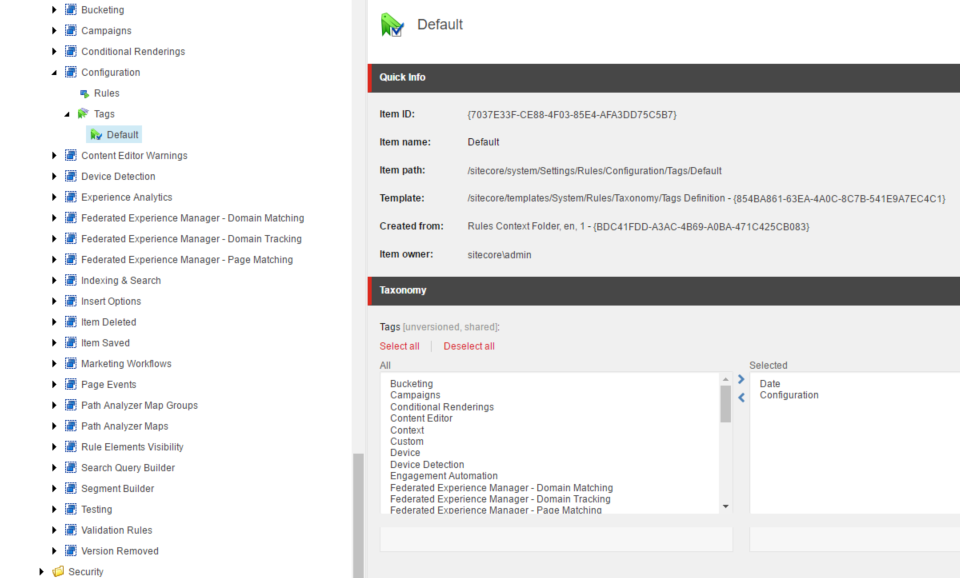
2.2 Set its Tags
Tags are used to link the conditions and actions to this Rule Context. The Tags folder will have a Tags Definition called Default. Which won't have any tags selected yet. We'll talk about tags a little bit more further in the article.
Go ahead and add the Date tag.
3 Configure your Source
Set your Source to your new Rule Context: /sitecore/system/Settings/Rules/Configuration
When you go back to your item and look at the Rule Set Editor, you'll now have the option to select a Date condition. Yeay, almost there!
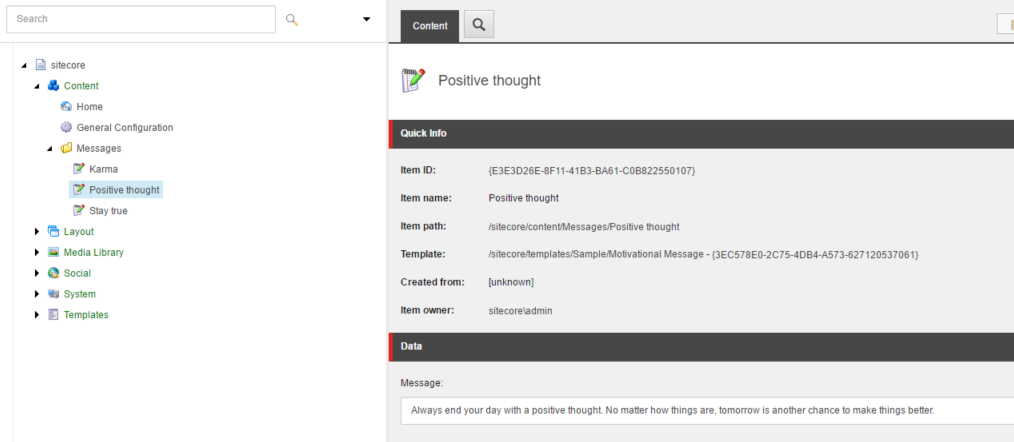
4 Create some test data
Lets recap my goal on the custom personalization:
I want to be able to configure the personalization so that I can return a different message each day.
I created a basic Message template with 1 Single-Line Text Field. Example of my motivational messages in the content tree:
Note the path of the Messages folder: /sitecore/Content/Messages.
5 Adding an action to your Rule Context
In /sitecore/system/Settings/Rules you have Rule Contexts and Definitions. Definitions contain everything that Rules need.
I'll just focus on Tags and Elements. Those are the only things we need for this tutorial.
Tags you already used in a step before when selecting the Date tag for your custom Rule Context.Tags glue everything together. Read this excellent article by Adam Conn which has a good visual explanation!
Create a new Tag Definition called Configuration.
Create a new Element. I've called mine also Configuration.
And select your newly created Tag Definition.

Now we still need to add a new action!
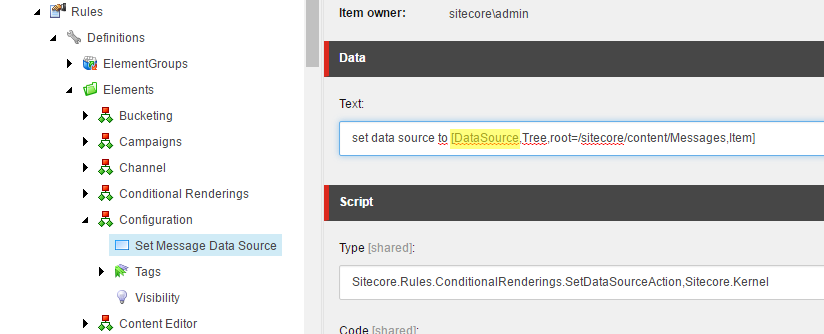
Right click Configuration element and Insert Action.
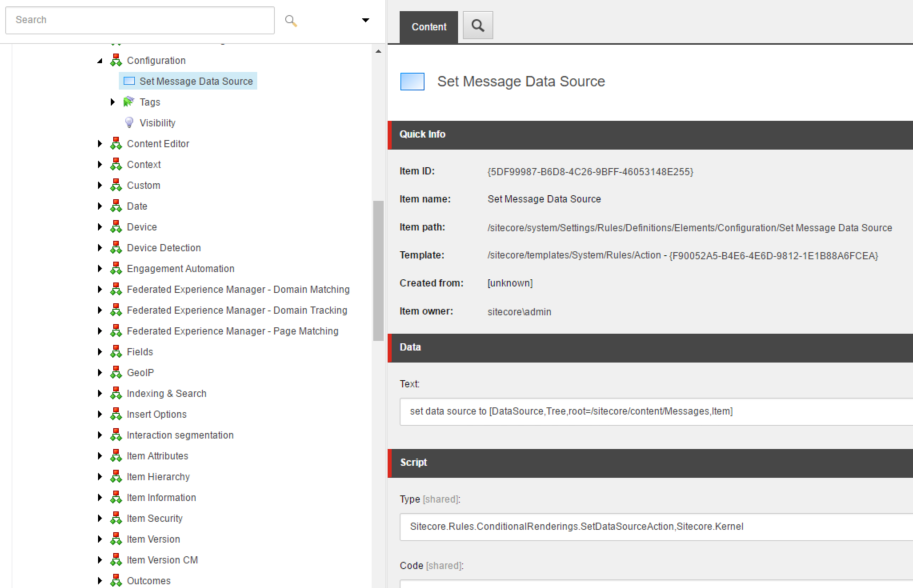
I'm actually reusing functionality from the Set Data Source rendering under the Conditional Renderings element.
Set the Text field with the correct root path: set data source to [DataSource,Tree,root=/sitecore/content/Messages,Item]
Set the Type field to: Sitecore.Rules.ConditionalRenderings.SetDataSourceAction,Sitecore.Kernel
6 Linking it all together
Add your new Tag to your Rule Context
Set Source to your Rule Context
/sitecore/system/Settings/Rules/Configuration
Configure your rules!
Everything is prepared now. We can add the conditions and actions that we want!
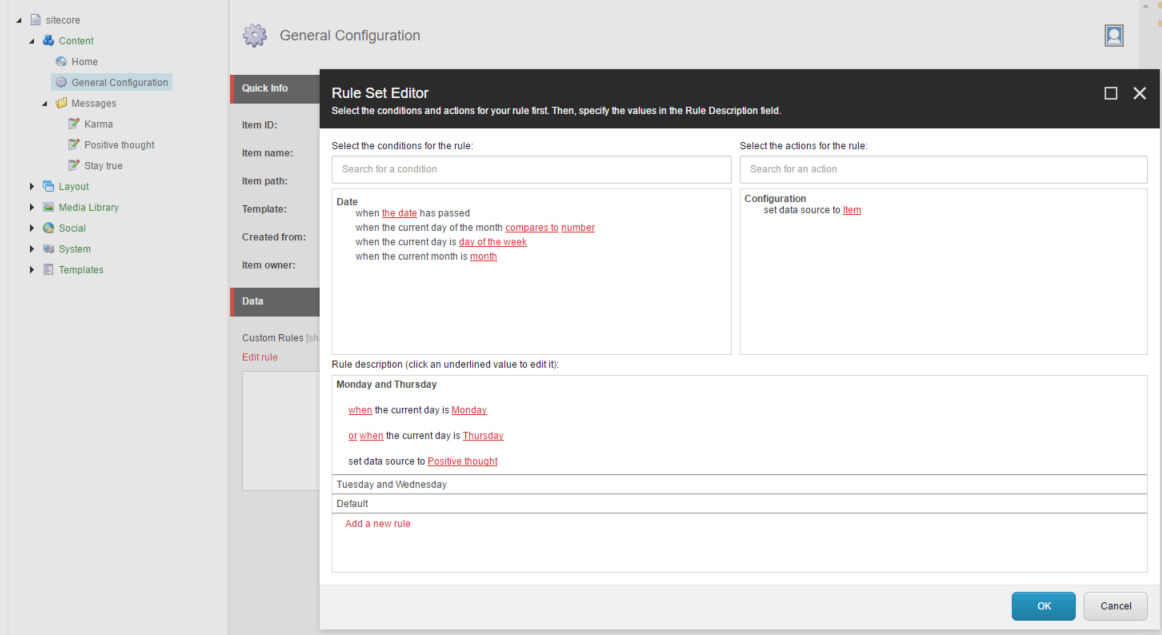
In this example I've configured 3 rules:
- On monday & thursday the datasource will be Positive thought
- On Tuesday & Wednesday it will be Karma
- And a default which just sets the datasource to Stay true.
Lets get to the coding...
So what do I need in my code?
1. A custom class which contains the Datasource for the action
public class SetItemAction<T> : RuleAction<T> where T : RuleContext
    {
        private string _dataSource;
        public string DataSource
        {
            get
            {
                return _dataSource ?? string.Empty;
            }
            set
            {
                Assert.ArgumentNotNull(value, "value");
                _dataSource = value;
            }
        }

        public override void Apply(T ruleContext) { }
    }
In the code above, the name of the parameter DataSource, must be the same as the one defined in your action in Sitecore:
2. A method that executes the rules
public class ConfigurationPersonalization
    {
        [Sitecore.CanBeNull]
        public Item GetPersonalizedConfiguration()
        {
            //The Configuration item
            var configuration = Sitecore.Context.Database.GetItem(new ID("{A43C3902-CEE6-4422-B09D-CDC4B6806031}"));
            //The field name on the Configuration item that contains the rules
            var fieldName = "Custom Rules";
            //TemplateId of the "Motivational Message" template
            var motivationalMessageTemplateId = new ID("{3EC578E0-2C75-4DB4-A573-627120537061}");

            //Create a RuleContext to execute the rules against
            RuleContext ruleContext = new RuleContext();
            //Use Sitecore.Rules.RuleFactory to exctract the rules from the field.
            IEnumerable<Rule<RuleContext>> rules = RuleFactory.GetRules<RuleContext>(new[] { configuration }, fieldName).Rules;

            //Evaluate a rule and if something fails, go to the next rule.
            foreach (Rule<RuleContext> rule in rules)
            {
                bool ruleOk = rule.Evaluate(ruleContext);
                if (!ruleOk)
                    continue;

                //I'm only executing the first action. Which is always "set data source to Item".
                RuleAction<RuleContext> actionItem = rule.Actions.FirstOrDefault();
                if (actionItem == null)
                    continue;

                //Convert the RuleAction to a custom implementation that has a DataSource property.
                //The DataSource property will be automatically populated by the rules engine.
                //Note that this means that the Action defined in Sitecore must have the parameter "DataSource".
                string itemId = ((SetItemAction<RuleContext>)actionItem).DataSource;
                ID sitecoreItemId;
                if (!ID.TryParse(itemId, out sitecoreItemId))
                    continue;

                //Get the item and check if the template matches the one you expect.
                Item datasourceItem = Sitecore.Context.Database.GetItem(sitecoreItemId);
                if (datasourceItem == null || datasourceItem.TemplateID != motivationalMessageTemplateId)
                    continue;

                return datasourceItem;
            }
            return null;
        }
    }
Additional resources
- How to invoke a Condition Rendering Rule from Code - Sitecore Community
- Use and evaluate the Rule field type - Sitecore MVP Benjamin Vangansewinkel
- Rules Engine Cookbook - Sitecore 6.1 documentation
- Limitin conditions and actions with Sitecore 7.1 - Adam Conn
- Roles and Rules, part 1 - Adam Conn
- Custom Rules and Conditions in Sitecore 7 - Sitecore MVP Roberto Barbedo
- Creating custom Sitecore SPEAK rule Conditions and Actions - Sitecore MVP Anders Laub