Getting started with PowerShell & Sitecore Azure Toolkit - Part 2
This is part of a series. Go to Part 1 here.
Part 2 is completely focussed on PowerShell and creating resources in Azure.
Create an Azure Service Principal and Azure Active Directory application
An Azure Service Principal is a specific account that allows you to provision / manipulate Azure resources in a non-interactive way. Instead of using your own account, create a service account with specific permissions.
Service principals are like user accounts to which you can apply rules using Azure Active Directory. By granting the minimum permissions needed to a service principal, you can ensure your automation scripts are even more secure.
Steps:
- Open PowerShell. I've used the PowerShell ISE to easily save some PowerShell scripts.
- Log in interactively with your account
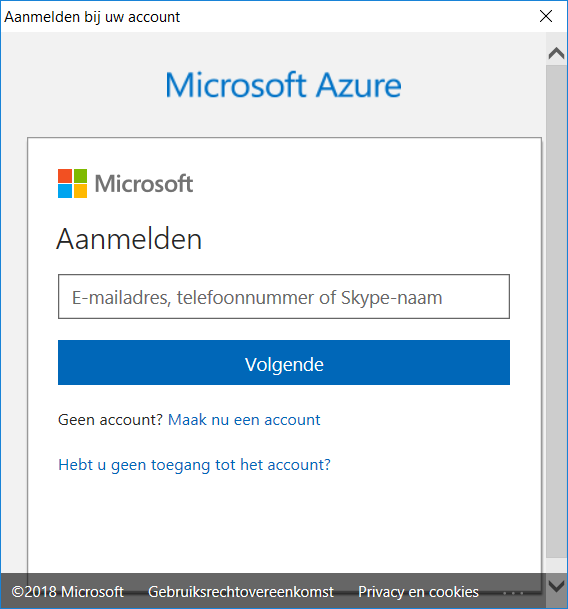
Connect-AzureRmAccount
Which will ask for your Azure credentials (screenshot is in Dutch, sorry):
- If you have multiple subscriptions, make sure you have the right one selected!
You can list all subscriptionsGet-AzureRmSubscription
And select another subscription withSelect-AzureRmSubscription -Subscription xxxxxxxx-xxxx-xxxx-xxxxxxxxxxxx - Create the new Application in Active Directory and the Service Principal
# Password for the AD application
$password = "ThisIsNotTheRealPassword"
$securePassword = ConvertTo-SecureString $password -AsPlainText -Force

Write-Output "Create the AD application"
$azureAdApplication = New-AzureRmADApplication -DisplayName "CI" -HomePage "https://ci.domain.be" -IdentifierUris "https://ci.domain.be" -Password $securePassword
$azureAdApplication | Format-Table

Write-Output "Create the Service Principal"
$servicePrincipal = New-AzureRmADServicePrincipal -ApplicationId $azureAdApplication.ApplicationId

Write-Output "Sleep for 20s so that Azure has enough time to create the Principal"
Start-Sleep -s 20

# Assign the Service Principal the Contributor Role to the Subscription.
# Roles can be Granted at the Resource Group Level if Desired.
Write-Output "Assigning the Contributor role to the service principal..."
New-AzureRmRoleAssignment -RoleDefinitionName Contributor -ServicePrincipalName $azureAdApplication.ApplicationId

Write-Output "ApplicationId: $($azureAdApplication.ApplicationId)"
The script above will use a Service Principal with a rather broad access level. Which is not recommended! Try to setup an account with the least privileges as necessary.
The Service Principal was also created with a password. Preferably, you create a Service Principal with a certificate. Which is a little bit more complex to setup.
It could be that 20 seconds is not enough for Azure to have created the Principal. If you see the error 'Principal {id} does not exist in the directory {guid}', try running the New-AzureRmRoleAssignment again after you waited a bit longer.

Log in with your Service Principal
Now that you have created one, log in with it!
You'll need to use the Login-AzureRmAccount commandlet for this. And have the following parameters correctly filled in/defined:
- -ServicePrincipal: To indicate that you are connecting as a Service Principal.
- -Credential: The secured password you used for creating the AD Application.
- -TenantId: The tenant of your Azure Subscription. You can find this by running
Get-AzureRmContext. - ApplicationId: The application id of the Azure AD application you created earlier.
$password = "ThisIsNotTheRealPassword"
$securePassword = ConvertTo-SecureString $password -AsPlainText -Force
$tenantId = "xxxxxxxx-xxxx-xxxx-xxxxxxxxxxxx"
$applicationId= "xxxxxxxx-xxxx-xxxx-xxxxxxxxxxxx"
$psCredential = New-Object System.Management.Automation.PSCredential($applicationId, $securePassword)
Login-AzureRmAccount -ServicePrincipal -Credential $psCredential -TenantId $tenantId
Create an Azure Resource Group
Azure Resource Group is a container that holds related resources for an Azure solution. The resource group can include all the resources for the solution, or only those resources that you want to manage as a group. You decide how you want to allocate resources to resource groups based on what makes the most sense for your organization.
For creating a resource group, you need to specify a name and a location and pass that to New-AzureRmResourceGroup.
The location is the region you want your resource group to be created in. A full list can be found on the Azure website. I am using West Europe in my example.
$resourceGroupName = "Name-Without-Spaces"
$location = "West Europe"

$resourceGroup = Get-AzureRmResourceGroup -Name $resourceGroupName -ErrorAction SilentlyContinue
if (-not $resourceGroup) {
    $resourceGroup = New-AzureRmResourceGroup -Name $resourceGroupName -Location $location
    Write-Output "Resource Group $($resourceGroup.ResourceGroupName) created."
}
The code above will first try to Get-AzureRmResourceGroup and if not found, will create it. In both cases, it will set a variable $resourceGroup which can be used in later scripts.
Please also note the -ErrorAction SilentlyContinue which will not interrupt the script when the Azure Resource Group does not exist.
Create an Azure Storage Account
Next we need an Azure Storage Account where we can upload Sitecore files to.
A storage account actually provides 3 different services: Blob storage, File storage, and Queue storage.
We are going to use Blob storage in the next section. And access it in a secured way. Blob storages are ideal for storing files for distributed access.
For creating the Storage Account, you need a name, the resourceGroupName, a location and the SkuName.
SkuName will define the redundancy for your Storage Account. Keep in mind: the more redundant, the pricier it will be!
I've chosen for Standard_LRS which is the cheapest.
The storage account name must be between 3 and 24 characters in length and use numbers and lower-case letters only.
$storageAccountName = "yourstorageaccountname"
$skuName = "Standard_LRS"
$storageAccount = Get-AzureRmStorageAccount -Name $storageAccountName -ResourceGroupName $resourceGroup.ResourceGroupName -ErrorAction SilentlyContinue
if(-not $storageAccount) {
    $storageAccount = New-AzureRmStorageAccount -ResourceGroupName $resourceGroup.ResourceGroupName `
      -Name $storageAccountName `
      -Location $location `
      -SkuName $skuName
    Write-Output "Storage Account $($storageAccount.StorageAccountName) created."
}
If you want to reuse an existing Storage account, you can do this too.
List all storage accounts and then select the one you want.
Get-AzureRMStorageAccount | Select StorageAccountName, Location
You can follow this guide
Uploading files to the Storage Account
So why did we create that Storage account?
When provisioning a Sitecore environment with the Azure Resource Toolkit, we are required to use WebDeploy packages (WDPs) containing the application code and databases. Sitecore themselves suggest to host the WDPs in an Azure Storage Account.
These WDPs don't have to be hosted by Azure, they could also be provided by a CI system like Octopus. Anyway, store them somewhere safe. Custom WDP packages shouldn't be available to everyone.
The default Sitecore WDP packages can be downloaded from the dev.sitecore.net website.

I've chosen to use the Packages for XP Single. Let's start off simple.
After downloading the zip, you need to unzip it! Small little detail that I overlooked the first time trying this.
So in my case, I need the 2 files:
- Sitecore 9.0.1 rev. 171219 (Cloud)_single.scwdp.zip
- Sitecore 9.0.1 rev. 171219 (Cloud)_xp0xconnect.scwdp.zip
Alternatively we can create our own Sitecore WDP files by using the Sitecore Azure Toolkit. But lets keep that for a next time (read more about it on the Sitecore website)!
Below is the script to use when uploading the files. Note that some variables are used from previous scripts. As long as you are in the same PowerShell session, you'll be able to use them.
We create a container in the storage account (here i called it wdp-container) and then upload the 2 files to it. Access to the storage is done through the use of a storageContext which needs an storage key.
$storageAcct = Get-AzureRmStorageAccount -Name $storageAccountName -ResourceGroupName $resourceGroupName
$storageKey = Get-AzureRmStorageAccountKey -Name $storageAccountName -ResourceGroupName $resourceGroupName
$storageContext = New-AzureStorageContext $storageAccountName -StorageAccountKey $storageKey[0].Value

$storageContainerName = 'wdp-container'
$storageContainer = Get-AzureStorageContainer -Name $storageContainerName -Context $storageContext -ErrorAction SilentlyContinue
if (-not $storageContainer) {
   $storageContainer = New-AzureStorageContainer -Name $storageContainerName -Permission Off -Context $storageContext
    "Storage Container $storageContainerName created"
}

Set-AzureStorageBlobContent -File "D:\Sitecore\Azure\Sitecore 9.0.1 rev. 171219 (WDP XPSingle packages)\Sitecore 9.0.1 rev. 171219 (Cloud)_single.scwdp.zip" `
  -Container $storageContainerName `
  -Blob "Sitecore 9.0.1 rev. 171219 (Cloud)_single.scwdp.zip" `
  -Context $storageContext

Set-AzureStorageBlobContent -File "D:\Sitecore\Azure\Sitecore 9.0.1 rev. 171219 (WDP XPSingle packages)\Sitecore 9.0.1 rev. 171219 (Cloud)_xp0xconnect.scwdp.zip" `
  -Container $storageContainerName `
  -Blob "Sitecore 9.0.1 rev. 171219 (Cloud)_xp0xconnect.scwdp.zip" `
  -Context $storageContext
What we'll do next
Part 3 will focus on the provisioning of the Sitecore environment itself.
- Create a self-signed certificate for XConnect
- Generate an Azure SAS token so that the Sitecore Azure Toolkit can access the files in the storage account
- Use the Sitecore Azure Toolkit to deploy a complete environment to a specific Azure Resource Group
Resources / further readings:
- What are Service Principals in Azure:
https://cmatskas.com/service-principals-in-microsoft-azure/ - Setting up a Service Principal in Azure manually:
https://docs.microsoft.com/en-us/azure/azure-resource-manager/resource-group-create-service-principal-portal - How to create a Service Principal (Azure docs):
https://docs.microsoft.com/en-us/powershell/azure/create-azure-service-principal-azureps?view=azurermps-5.6.0 - How to create a Service Principal (Octopus docs):
https://octopus.com/docs/infrastructure/azure/creating-an-azure-account/creating-an-azure-service-principal-account - How role based access works in Azure:
https://docs.microsoft.com/en-us/azure/active-directory/role-based-access-control-what-is - What is an Azure Resource Group:
https://docs.microsoft.com/en-us/azure/azure-resource-manager/resource-group-overview - Documentation on New-AzureRMStorageAccount:
https://docs.microsoft.com/en-us/powershell/module/azurerm.storage/new-azurermstorageaccount?view=azurermps-5.6.0 - Create Storage account and use Storage Explorer instead of using PowerShell for everything: https://doc.sitecore.net/cloud/working_with_sitecore_azure_toolkit/deployment/deploy_a_new_sitecore_environment_to_azure_app_service#_Prepare_WebDeploy_packages