Sitecore Content Hub - State Flows

Let's start by learning what a State Flow in Sitecore Content Hub is!
State flows allow you to guide your Content Hub users in any custom way that you want. It provides clear steps to go from 1 state to another and provides a nice way to control how your custom entities in Content Hub are created, managed and published.
A state is a step in the life cycle of a content item. A state flow is your movement from the first step to the last, triggered by specific events or actions. All these states, transitions, and actions are defined by you and are finite.
https://doc.sitecore.com/ch/en/users/content-hub/configure-content-hub--state-flows.html
2. OOTB state flows with CMP
I want to make the distinction between Content Hub functionality around State Flows and the CMP module: Content Marketing Platform.
CMP = a complete package of Content Hub functionality to manage campaigns to create content. It allows you to plan, create and approve the creation of content such as blog posts, social media posts, emails and so on. And ... it uses State Flows internally. So there already are OOTB State Flows available for Content.
Before choosing to use custom state flows, it's beneficial to look into what CMP has to offer and to decide if that is the direction you want to go.
Documentation State Flows
https://doc.sitecore.com/ch/en/users/content-hub/manage-content--state-flows.html
So when we look at State Flows, there already are some available in Content Hub:
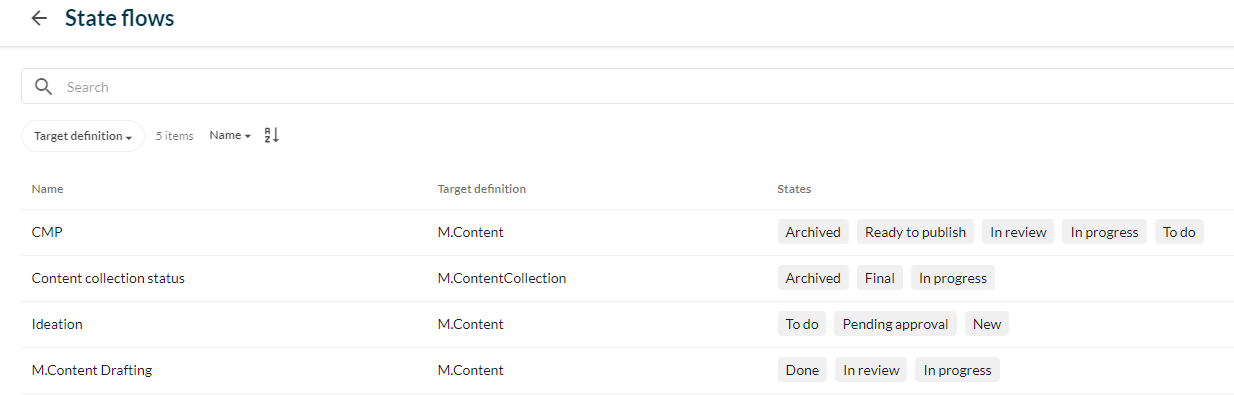
You can see their Target definition. 3 of them are related to M.Content.
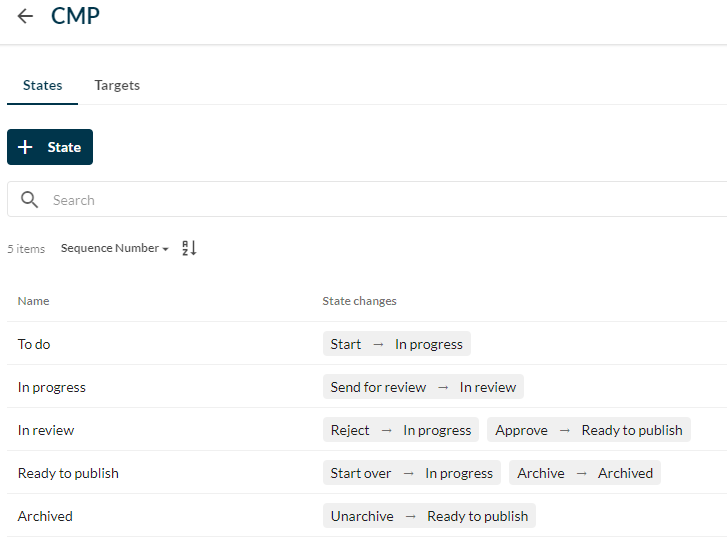
The CMP flow has for example these state changes available:
3. Creating and enabling a custom state flow
Sitecore documentation provides the necessary steps! So go ahead and read their documentation as well!
I listed the similar steps below and give some additional pointers!
Preparation
- Have a definition ready
- Have a Detail page ready for that definition
This detail page is used as destination page for the links in email and real-time notifications and for the target links in the target search page
Enabling the state flow
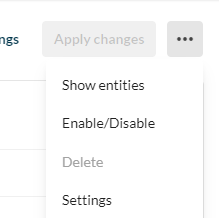
- Go to the schema for the definition that you want to enable a state flow
- Choose Enable/Disable and then State Flow
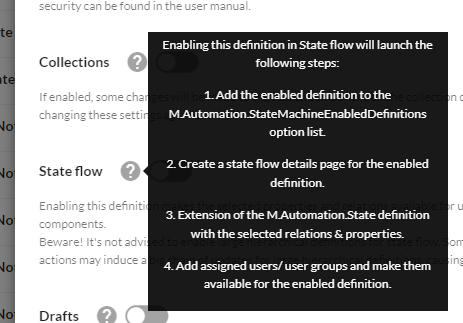
- You'll get a popup where you need to select your Detail page!
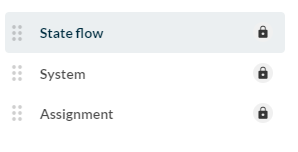
- After confirming this, your definition will be updated and now have 3 new sections:
- State flow: linking to the StateMaching
- System: contains the current active state and the available states to go to
- Assignment: with the user defined for the current state, the assigned user and the assigned usergroup
Editing the detail page to include the transition step buttons
- Go to your detail page in Pages
- Add a component: Entity operations
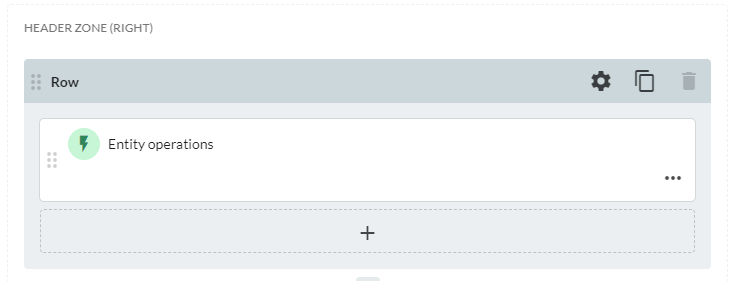
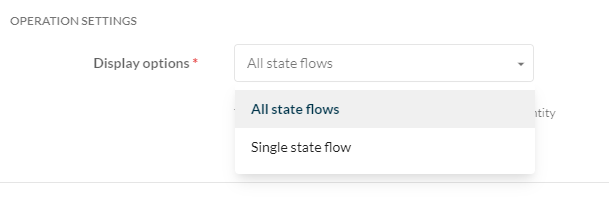
- Add operation and select State flow transitions
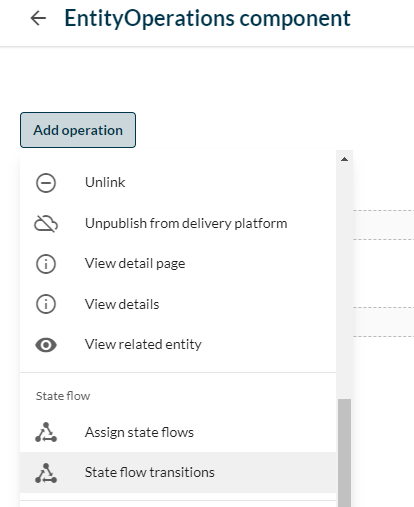
You will be able to control which State Flow this controls. Or keep the default: All State Flows.
If you view your Detail Page now, you'll not see anything yet since we haven't configured the different states yet!
Creating your custom state flow
- Go to the State Flows page in admin: /admin/sm
- Press the Add State flow button
- Select the Target Definition
If your definition is not visible here, you haven't enabled the State Flow on it. Go back to the first step: Enabling the state flow
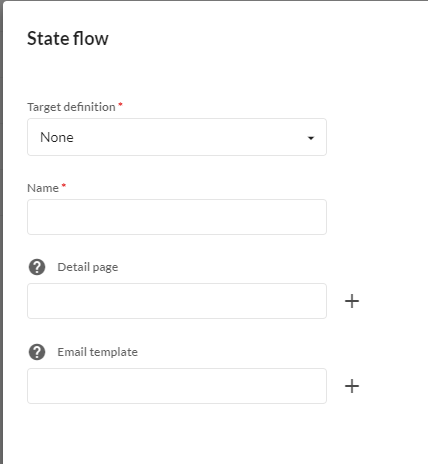
- Give it an appropriate Name
- Detail page and Email template don't need to be filled in
A Flow can only be linked to 1 Target Definition.
But a Defninition can have multiple State Flows!
- Click on your new state flow and start adding states!
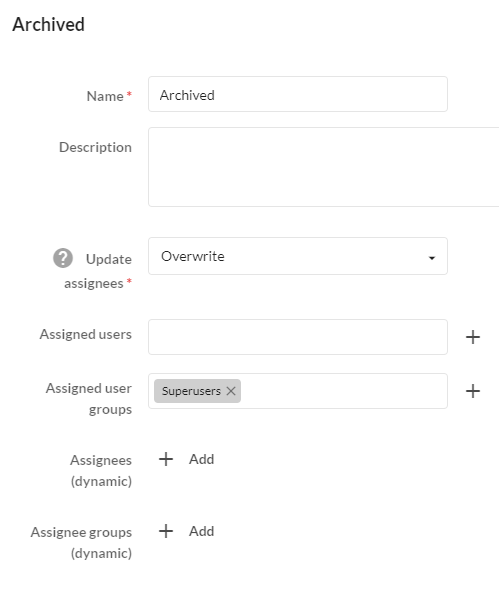
- I chose for 3 states: Created, Approved and Archived
Important here is that you select specific users or groups that need to be involved in this state. For example, I only want administrators to be able to unarchive. So the Archived state is assigned to them.
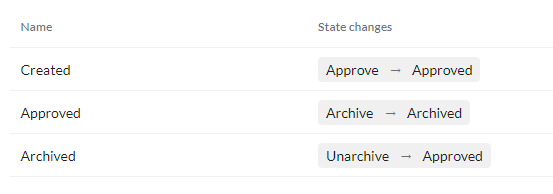
- Next are your state changes. I want to be able to:
- move from Created to Approved.
- from Approved to Archived.
- from Archived back to Approved.
Each state has 1 State Change except for Archived.
Overview:
Ask for confirmation for states that move an entity to other assigned users. Since the user currently editing it probably won't have the ability to move it again to another state.
An assigned user must be a superuser or have the 'Update' permission to transition the state flow.
Congratulations, you've configured a state flow!
4. Additional configuration
All cool now, but what else is needed? In my scenario, I needed a few things extra!
Newly created entities don't have my state flow options
That's right, newly created entities will not have your custom state flow assigned automatically.
You need to create an Action and Trigger in Content Hub for it to "start" your state flow!
Good to know: State flows can be kicked off in different ways. It can also be triggered by a modification or another state flow that is in a certain state.
- Go to Actions > New Action
- Add an action with type Start state machine and select your created State flow
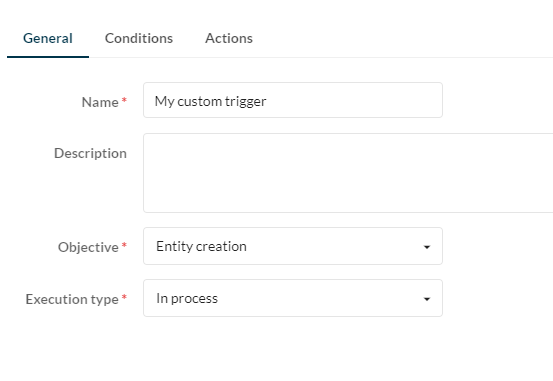
- Go to Triggers > New trigger
- Give it a name, select the Objective and Execution type
- In the Conditions tab, make sure to select your definition!
Good to know:
You can do a lot with Conditions. You can add restrictions so that your trigger will only be kicked of if certain fields have a specific value for example.
Or if you are in a certain state.
- In the Actions tab, add the previously created action in the Post actions section!
Already existing entities don't have my state flow options
Well... that is because those entities were already created.
So your option is to update your existing entities. Manually or through the Content Hub API.
Have a look at an existing entity and see which fields are filled in, you can then use the same values in the API as well.
https://{your-url}.sitecorecontenthub.cloud/en-us/admin/entitymgmt/entity/{your-entity-id}
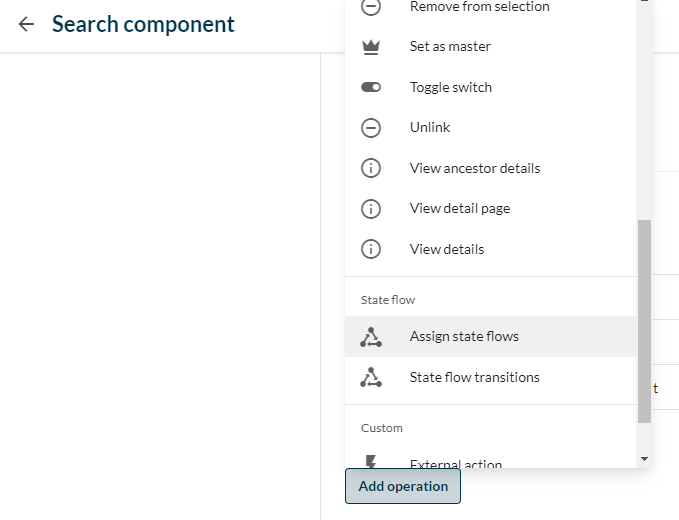
I went for an approach that listed all entities in a search component. And then used the 'Assign state flows' functionality to manually go through all entities and select my new state flow. This was rather fast since we didn't have that many entities yet.
I use Experience Edge and don't want to have entities published when not in the right state
Right, now we come to another advantage!
You can limit your entities from being published if they are not in the right state!
- Go to your definition > Delivery platform settings
- Add a condition, select the ActiveState field and use Contains on the states that you want your entities to be checked on.

I want to transition the state flow in a table
Perfectly possible, instead of using the Entity Operations component described above, you can Add an operation on your Search Component as well!